
How to Create An Invoice Template – Tutorial & Free Template
How to make an invoice? When you start your own business there are a lot of things you need to take care of. High up that list is ensuring you get paid, and to do that you need a top notch invoice template. So we’ve created this guide on how to create your own invoice template.
This free tutorial covers everything you need to know – what to include, where to put it and some best practice tips. Just open up Excel and follow the steps below.
If you’re in a hurry you can also just use one of these free, ready-made invoice solutions instead.
Table of Contents
How To Create an Invoice Tutorial
Creating an Invoice: Step-by-Step
1. Dates

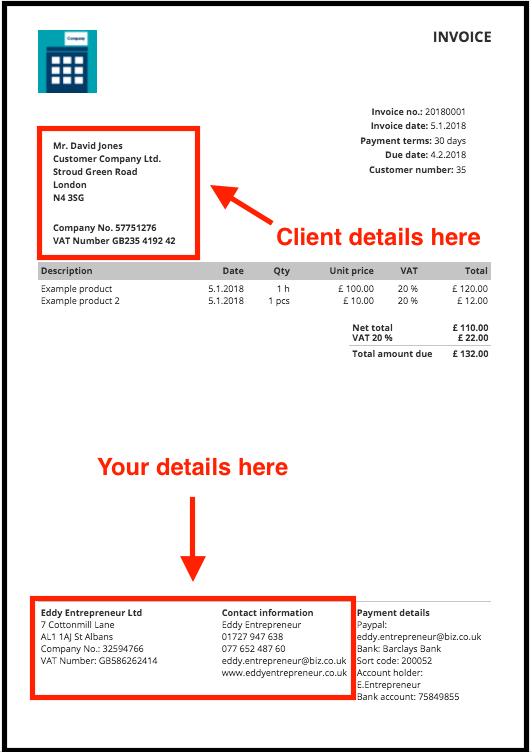
The first date to include is when your invoice was created. This may seem obvious, but it often differs from when you provided your goods or services (a.k.a. the supply date). Also include the due date for your invoice, typically 30 days after it was created. All this information goes in the top right.
2. Contact Details
Your client’s details go in the top left corner and your own contact details are best placed in the footer. Include name, address, phone number and email. If you’re a limited company, include your company number. If you’re registered under one name but trade under a different one, include both.
3. Legal Requirements
There’s a bit more information you need to add to your invoice to ensure you’re legally compliant. Ensure that each and every invoice has a unique number, and try to stick to sequential numbering. Don’t throw away any spoiled or unused invoices in this sequence, just in case the tax man asks for them!
HMRC has certain guidelines you need stick to when it comes to VAT and record keeping. First off, if you’re VAT registered, include this number on each and every invoice. Also show the price of every item before, and after, VAT. This includes the unit price excluding VAT, the applicable VAT rate, and the gross amount due.
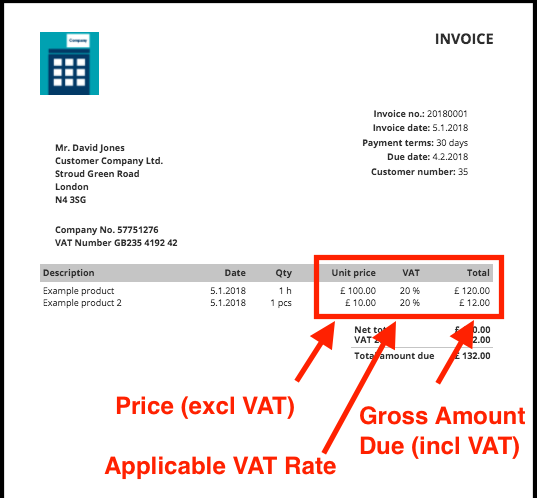
When calculating totals you need to specify the total amount of VAT, and the overall total for the invoice. Even if you’re not VAT registered, try to include as much information as possible. It’s good bookkeeping practice.
4. Payment Details
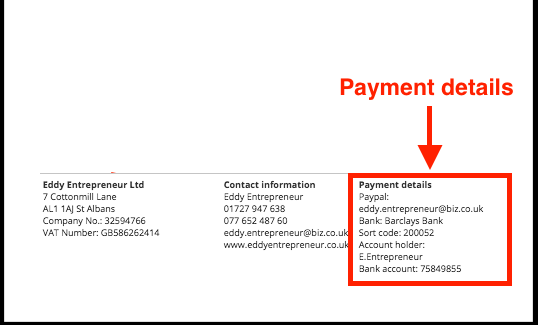
Specify when and how you’d like the invoice to be paid, and include all relevant information (eg. your bank name, account number and sort code). A good place for this is the footer, next to your contact details.
Adding a reference number for the payment will make it easier to track in your bank account (you can use the invoice number for this). If the customer has given you a purchase order (PO) number, include this too.
5. Brand
Something that is often overlooked when it comes to invoicing is the exposure and advertising potential it brings. This invoice represents your business brand, so make sure it reflects what you want it to say about your business.
Add your logo and choose an appropriate tone for your product descriptions. You may even want to add a thank you message for your client.
And there you go – ready to invoice!
If this all seems a bit time intensive you can use one of our ready-made invoice templates (they come in Word, Excel, PDF and online format). Or indeed sign up for our free invoicing software. Whatever you do make sure you get paid for the work you do!

You may also be interested in
-
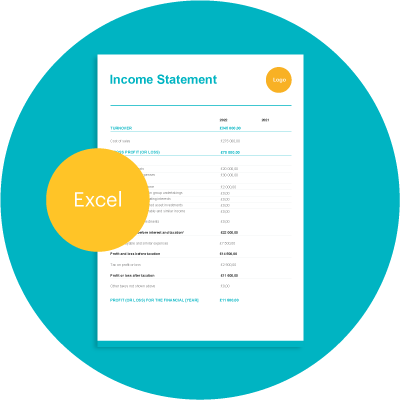
Income Statement Template
An income statement or profit and loss statement will tell you how much money your company has made over a period, usually the company’s financial year.
-
Cash Flow Statement Template
A cash flow statement can help you to manage your finances and avoid the worst surprises. It reports the cash flowing in and out over a particular period.
-
Business Continuity Plan Template
A business continuity plan (BCP) helps protect your business from the effects of disruption. Download our free BCP template to prepare today.